It’s the time of year when colorful leaves take center stage. Bright, vibrant foliage dances on the wind, and Autumn leaves are a poignant facet of the season. But they’re not the only leaves with a notable role this time of year. With harvest season beginning, the cannabis leaf is in its glory.
Get creative with cannabis. Find your favorite strain nearby.
After cannabis flowers are harvested, left behind are beautiful leaves, and just like the striking red and orange leaves of oak, cannabis leaves are perfect for getting creative and crafty.
Below, discover three fun ways to turn cannabis leaves into practical and decorative art.
Cannabis Leaf Clay Bowl
This beautiful air-dry clay craft is easy, fun, and customizable, making it a fantastic way to preserve the natural beauty of cannabis leaves.
What you need:
- Air-dry clay
- Floss
- Large, fresh (i.e. malleable) cannabis leaves
- Rolling pin
- Wet sponge
- Sharp knife
- Acrylic paint
- Sealer
Step I: Prepare the Clay
Remove a large section of clay from the block using the dental floss to slice through it. Work the clay to remove any air pockets and then use the rolling pin to roll out a flat patty that’s about ½ inch thick.
Use the wet sponge to keep the clay from drying out as you work with it. Place the cannabis leaf on top of the clay, then use the rolling pin to press the leaf into the clay and imprint the leaf’s details. Make sure to use a large leaf so that the bottom portion can serve as the bowl, while the tops of the leaf will be more decorative.
Step II: Form the Bowl
Gently pry the leaf off the clay, then use the knife to cut the excess clay away from the imprint. Next, take the clay with the imprint and use your hands to gently cup the clay and shape it.
Work the tops of the leaves upwards, curling them, and mold the bottom to create a bowl, then add any extra detail—such as curling the edges.
Step III: Let It Set
Place the clay on top of another, smaller bowl to ensure it maintains its curved shape while drying. Something must be under the edges to support them and keep them in place.
Allow 72 hours to dry completely.
Step IV: Get Creative
It’s time to paint! Let your imagination go wild. You can use natural colors to outline the stems and separate them from the leaf, or you can get creative and try your best rendition of Van Gogh’s Starry Night.
Finally, use a matte or gloss sealer for protection and allow to dry.
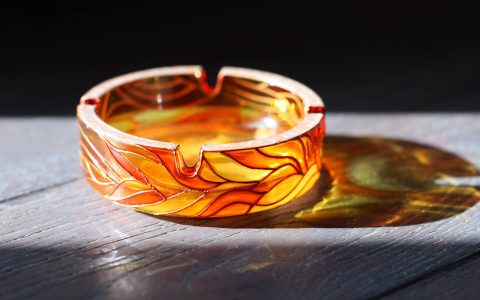
Once dry, you have your cannabis leaf bowl! Avoid getting it wet and keep in mind it is not food safe. Now you have the perfect ashtray, displaying rolled blunts, joints, and smoking tools, or simply a beautiful decorative item in your home.
Cannabis Leaf Stash Jar
This beautiful and trendy mason jar features a cannabis leaf shaped “window” and the colors of your choice.
What you need:
- Large mason jar
- Small to medium sized cannabis leaf
- Scissors
- Vinyl decal material
- Acrylic paint
Step I: Make Your Cannabis Leaf Cut Out
Make sure the cannabis leaf you choose will fit on the side of your mason jar. Then, place the cannabis leaf against the vinyl decal material and carefully and slowly cut around the leaf. You can also place the leaf against white paper and trace it before cutting.
Step II: Adhere the Vinyl
Once you have a cannabis shaped vinyl cut out, wipe the sides of the mason jar to be sure it’s clean, then adhere the cutout to the flat side surface of the jar by peeling off the paper backing.
Tip: Make sure to smooth the decal down to ensure the edges are well adhered and won’t allow any paint to drip inside.
Step III: Paint
Use acrylic paint and a large brush to paint the outside of the mason jar any color you wish. Consider metallic or glittery acrylic paint for something a little different.
Allow the jar to dry completely overnight.
Step IV: Peel and Reveal
Once the paint is completely dry, slowly and carefully peel away the vinyl sticker.
Voila! You now have a beautiful, painted stash jar.
DIY Cannabis Leaf Throw Pillows
These artsy and DIY throw pillows are an elegant and classy way to bring cannabis décor to your home and preserve the beauty of cannabis leaves for years to come.
What you need:
- White linen or cotton throw pillows
- Large, well-formed cannabis leaves
- Black textile paint
- Paint brush
- Newspaper
Step I: Prep the Pillows
Lay out the pillow and open the cover on one side. Stuff newspaper under the side you are going to paint in order to protect the fabric beneath from any extra paint leaking through.
Step II: Paint and Apply
Place the cannabis leaf you want to use on top of newspaper to protect your table, then using the paint brush, paint a generous layer of black textile paint over the entire front of the leaf. Then, carefully place the painted side of the leaf down onto the pillow where you want the print to be.
Use some clean newspaper to carefully smooth the leaf down onto the fabric. Next, carefully—and with clean hands—peel the leaf away from the pillow case.
Allow to dry thoroughly and then remove the newspaper inside the pillow.
Tip: Although this tutorial recommends black textile paint for a classy, simple look, this same technique can be used with any color textile paint of your choice.


